Turn your Cloudflare Workers and KV into a fast serverless cache store with HTTP endpoints
 Patrick Chiu • 2023/08/25
tl;dr Here’s the Git repo you can instantly deploy to your Cloudflare Workers and KV with read, write, delete and list functionalities
In this tutorial, we will create a simple Cloudflare Workers app that read and write to the KV with the value we provide. Before that, we will discuss how we can leverage this idea and make it a feasible option as a fast HTTP-based KV store for any external application to use.
Table of Content
- How can it be useful?
- Designing the KV endpoints
- Set up Workers and KV
- Implementing the Write functionality
- Implementing the Read functionality
- Deploy and Test it
- Epilogue and Cache Cloud which does all the KV stuff for you!
How can it be useful?
Workers KV is the built-in edge storage offering of the Cloudflare Workers ecosystem. It is exceptionally fast and always nearby your Workers app (after the initial reads). And guess what? Workers is also edgy and nearby your main application with a very low latency.
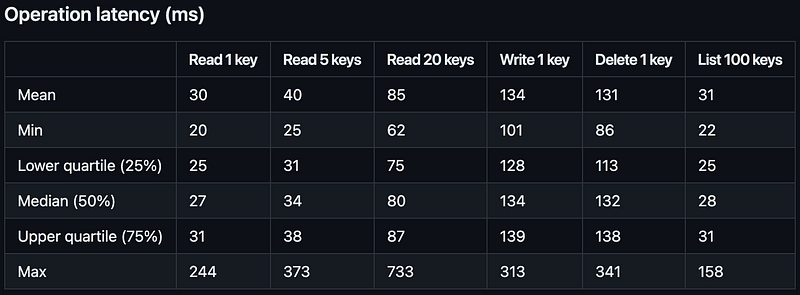
How fast is it? Below is the benchmarks summary of making HTTP requests to a Cloudflare Workers app which connects to the KV. And here’s the link of the detailed results.
Note: we usually expect read and list to be as fast as possible, while we can tolerate write and delete to be slower.
In addition, Workers and KV are serverless. Cloudflare manages the infrastructure and servers for us. We don’t need to worry about the auto-scaling and it supports 0ms cold starts too.
Designing the KV endpoints
KV is only callable from Workers, and this is why we need to expose an HTTP interface via Workers, so that it can be used externally.
Here’s what it looks like to “Get a cached value by key” from your main app.
// You can define your own `cacheKey`, save and get values from it
// e.g. user%3A1%3A <= encodeURIComponent('user:1:')
const cacheKey = 'latest-blog-posts';
const response = await fetch(
  `${YOUR_CLOUDFLARE_WORKERS_HOST}/kv/values/${cacheKey}`,
);

const { success, result: latestBlogPosts } = await response.json();
if (!success || !latestBlogPosts) {
  // Cache not found :(
  // Fetch and cache it here!
}

// Cache found, return it instantly!
return res.json(latestBlogPosts);
The essential functionality of a KV store is read and write. Let’s design 2 endpoints for each of them.
Note: let’s ignore the error handling and focus on the core functionality for now.
1. Read operation
GET /kv/values/{{key}}
Path Parameter
| Field | Type | Description |
|---|---|---|
| key | string | The cache key to get value from |
Response Body
| Field | Type | Description |
|---|---|---|
| result | any or null | If there is value in the cache key, well, it will be the value If there isn’t, it will be null |
2. Write operation
PUT /kv/values/{{key}}
Path Parameter
| Field | Type | Description |
|---|---|---|
| key | string | The cache key to upsert value |
Request Body
| Field | Type | Description |
|---|---|---|
| value | Any | The value to be writen to the cache key {{key}} |
| expirationTtl | integer | seconds from now that the cache will expire |
Response Body
| Field | Type | Description |
|---|---|---|
| success | boolean | Whether the operation is successful |
Set up Workers and KV
Assume you have created a Cloudflare account already. If not, visit this link to create one before proceeding!
1. Create a new Worker project
npm create cloudflare@latest
This will prompt you to install the create-cloudflare package, and lead you through setup.
For this guide, set up a basic Worker:
- Name your new Worker name
my-serverless-cache-store. - Select “Hello World” script as the type of application you want to create.
- Select Yes for the question Do you want to deploy your application? because Cloudflare requires us to deploy a Workers before we can configure a KV afterwards
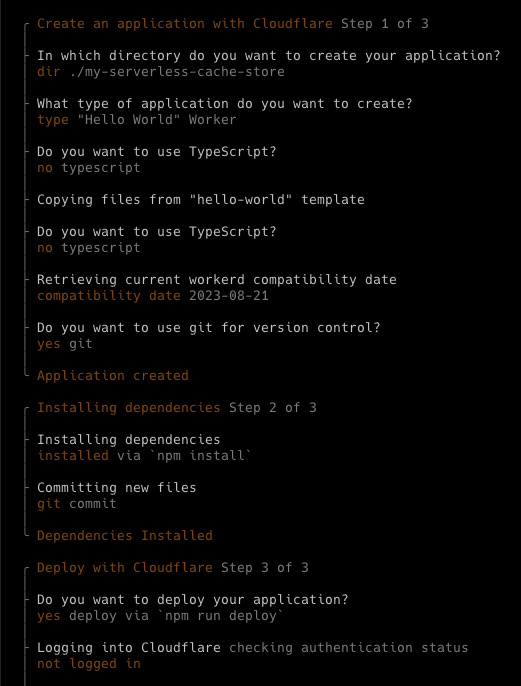
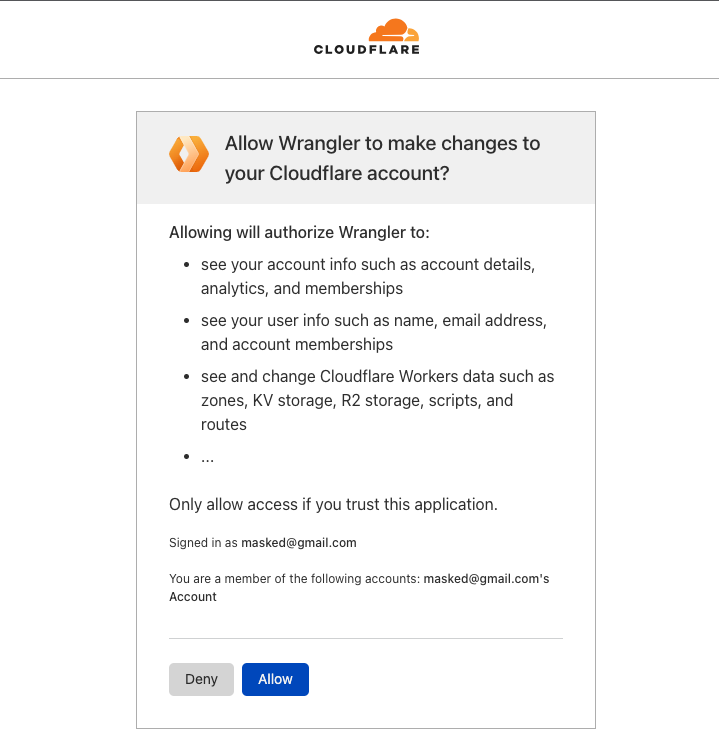
Since its the first time we deploy, Cloudflare requires us to login via the terminal. Select “Allow” Wrangler to make changes to our account.
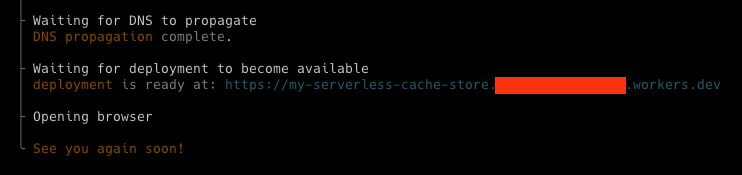
After that, Wrangler should have deploy a Workers app with a public link.
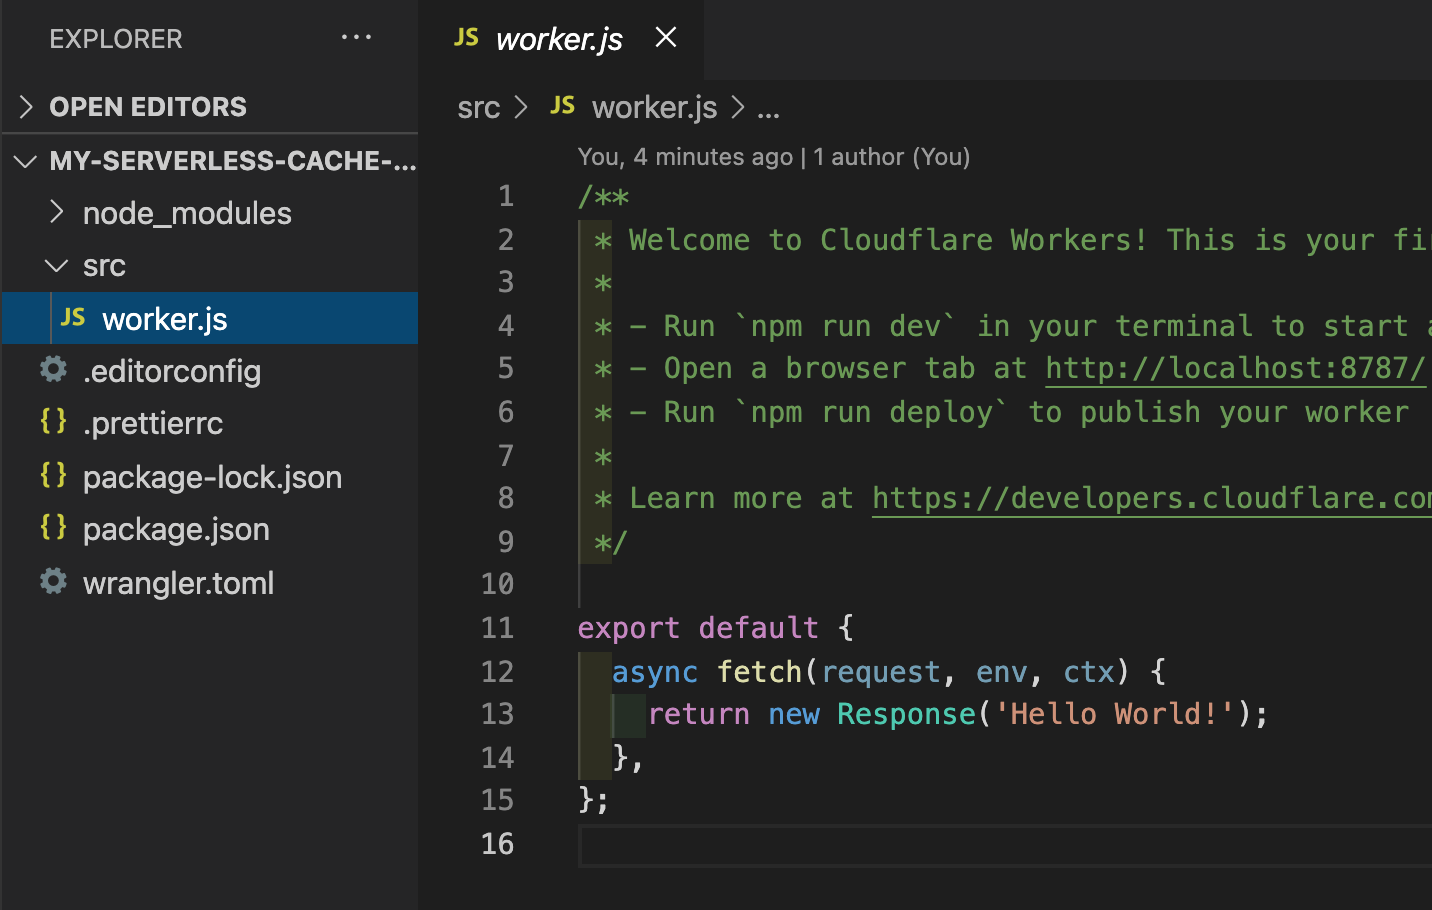
In your project directory, C3 (create-cloudflare-cli) has generated the following:
wrangler.toml: Your Wrangler configuration file.worker.js(in /src): A minimal ‘Hello World!’ Worker written in ES module syntax.package.json: A minimal Node dependencies configuration file.
2. Install hono and setup the KV endpoints
As you see, Cloudflare Worker’s default way of handling HTTP request is to define the fetch method, which might feel foreign to developers that are familiar to Express.js or Koa.js.
Let’s cd into our worker my-serverless-cache-store and install Hono.js which is a web framework that works very well with Cloudflare Workers.
cd ./my-serverless-cache-store
npm install hono --save
After that, let’s update worker.js (in /src) as followed to return a dummy response to our read and write KV endpoints.
import { Hono } from 'hono';
const app = new Hono();

app.get('/kv/values/:cacheKey', (c) => {
  const cacheKey = c.req.param('cacheKey');
  return c.json({ cacheKey });
});

app.put('/kv/values/:cacheKey', async (c) => {
  const cacheKey = c.req.param('cacheKey');
  const body = await c.req.json();
  return c.json({ cacheKey, body });
});

export default app;
For the Read endpoint, we return whatever is passed as the cacheKey.
For the Write endpoint, we return the cacheKey as well as the request body. Note: remember to add the async keyword, since the function to parse request body c.req.json() needs to be awaited.
You can spin up the Workers app locally by npx wrangler dev --remote=true. remote=true here means that we want to use the actual KV in Cloudflare, but not an in-memory one.
Let’s try out the dummy endpoints with Postman!
Looks good!
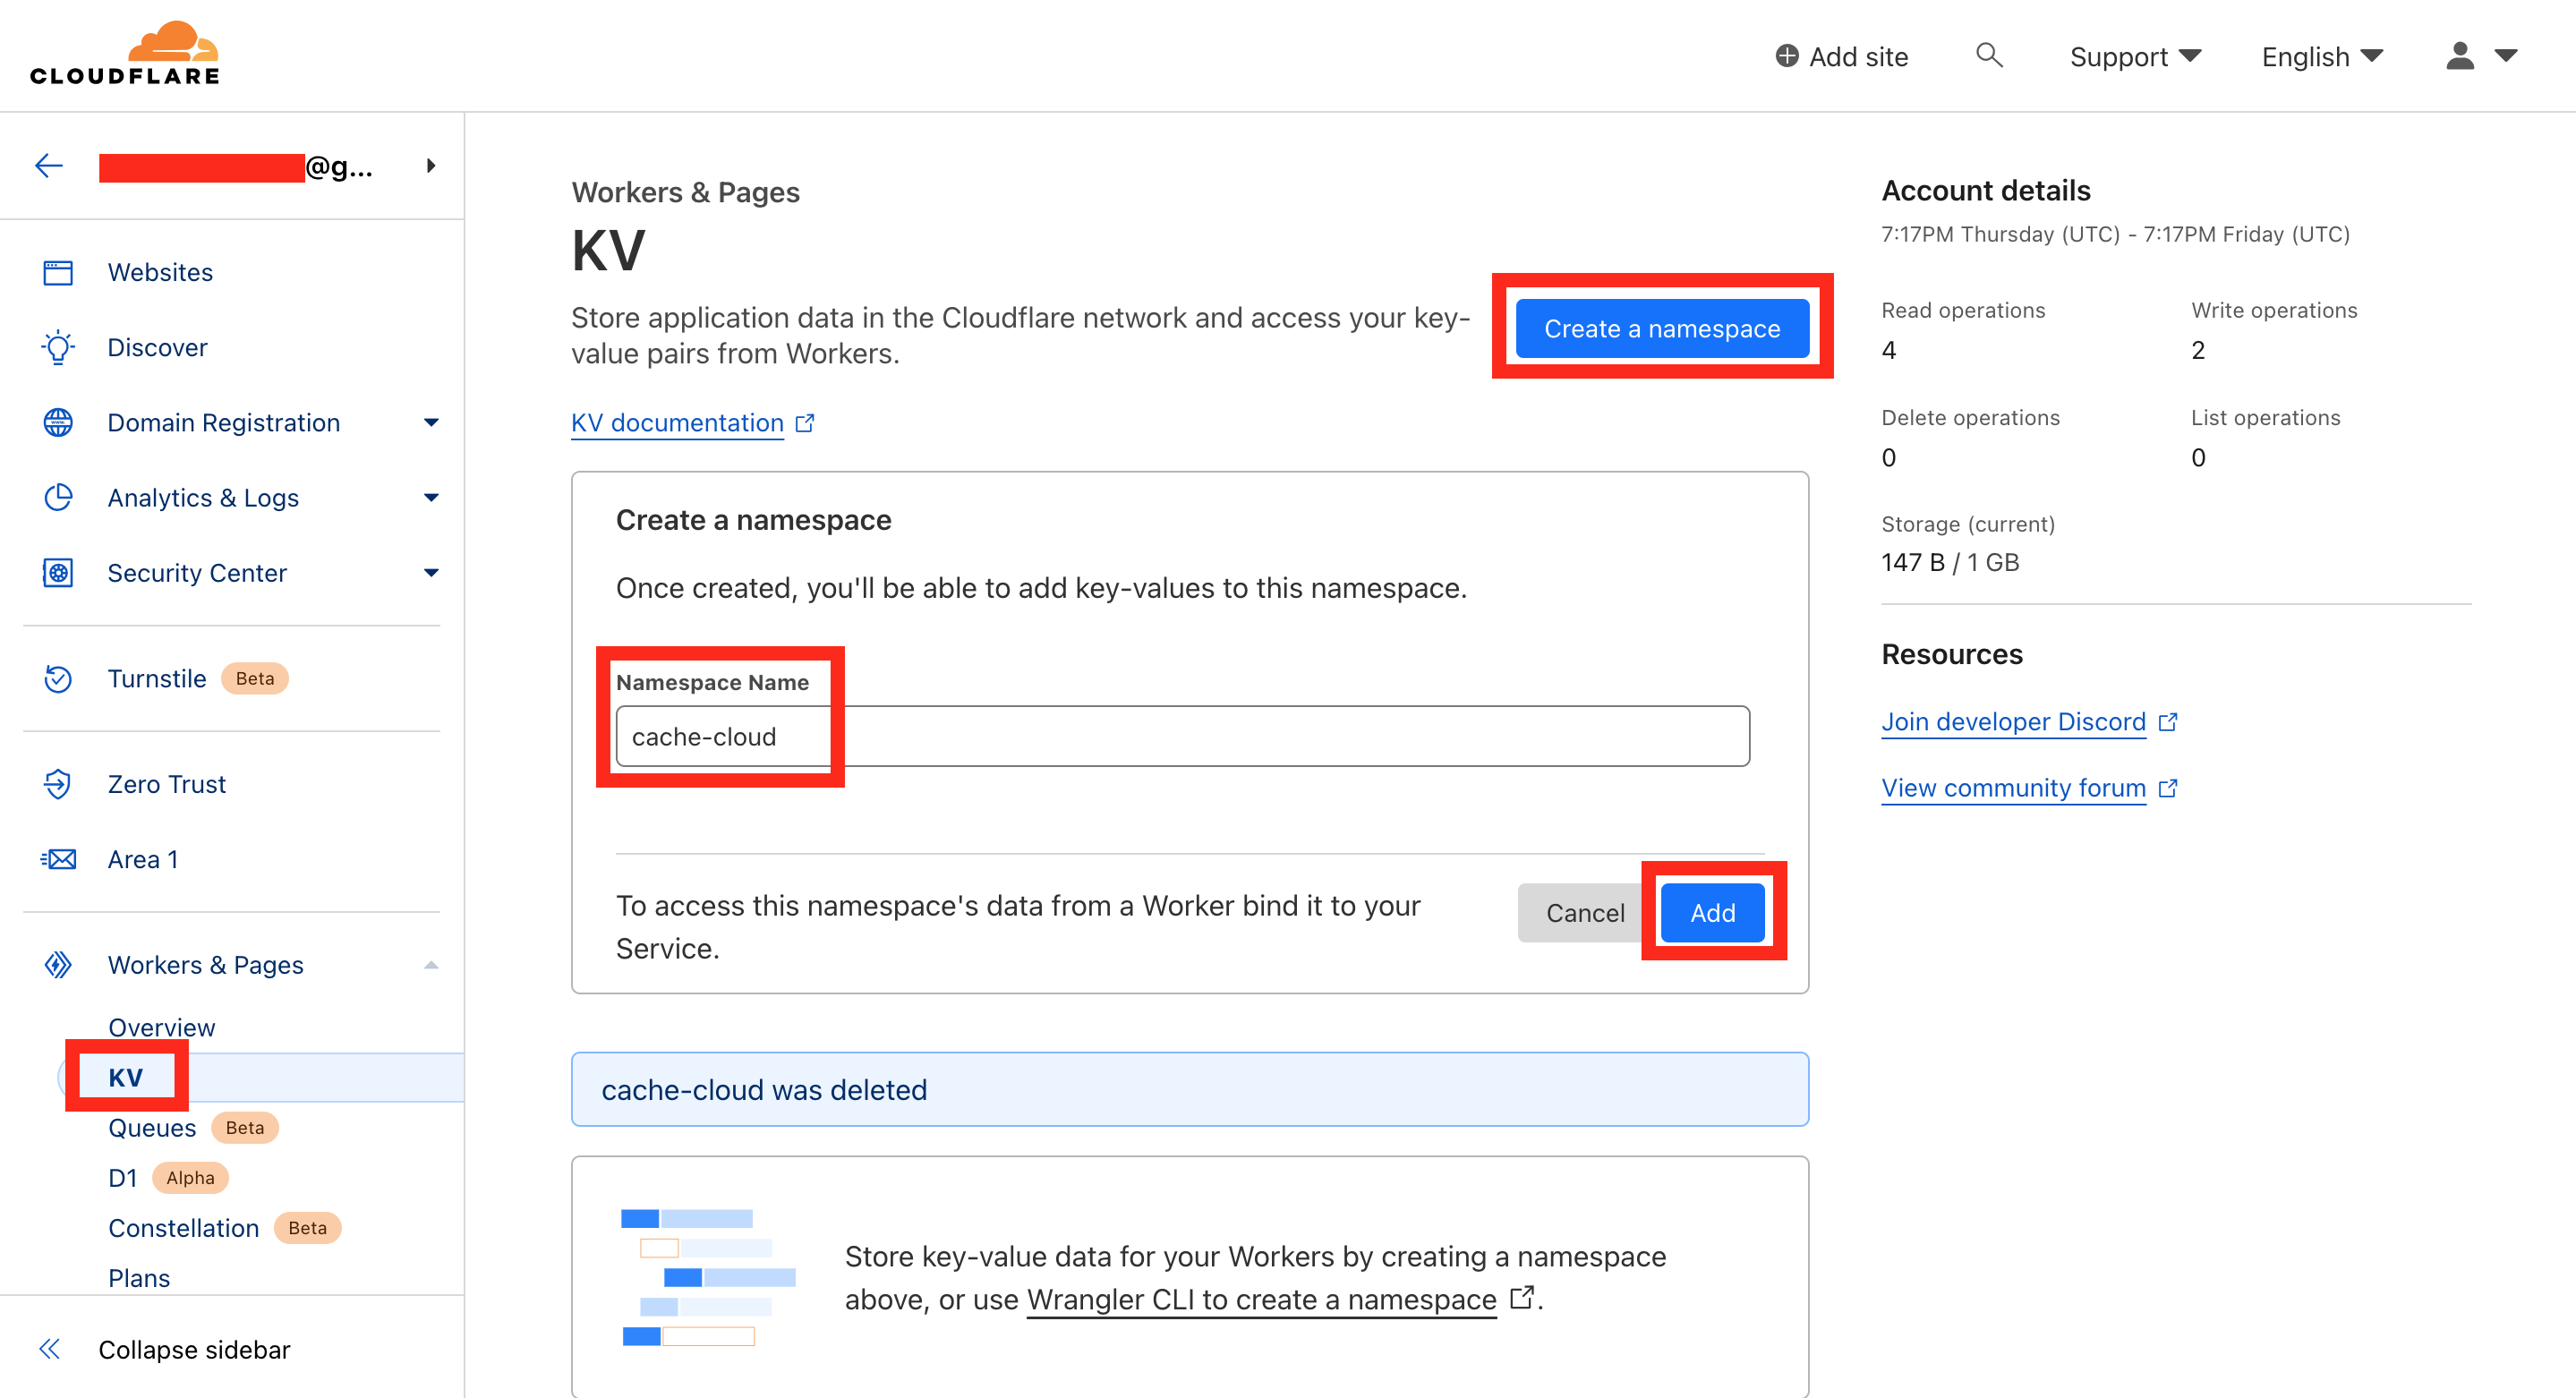
3. Configure KV
Next, configure a KV in Cloudflare’s dashboard by
- Clicking “KV”
- Clicking “Create a namespace”
- Naming your KV namespace (The name doesn’t matter. All it matters is the KV ID in step 4)
- “Add”
4. Bind KV to the Workers app
Next, let’s bind KV to the Workers app by specifying the KV ID in the wrangler.toml. You can find the ID via Cloudflare dashboard here.
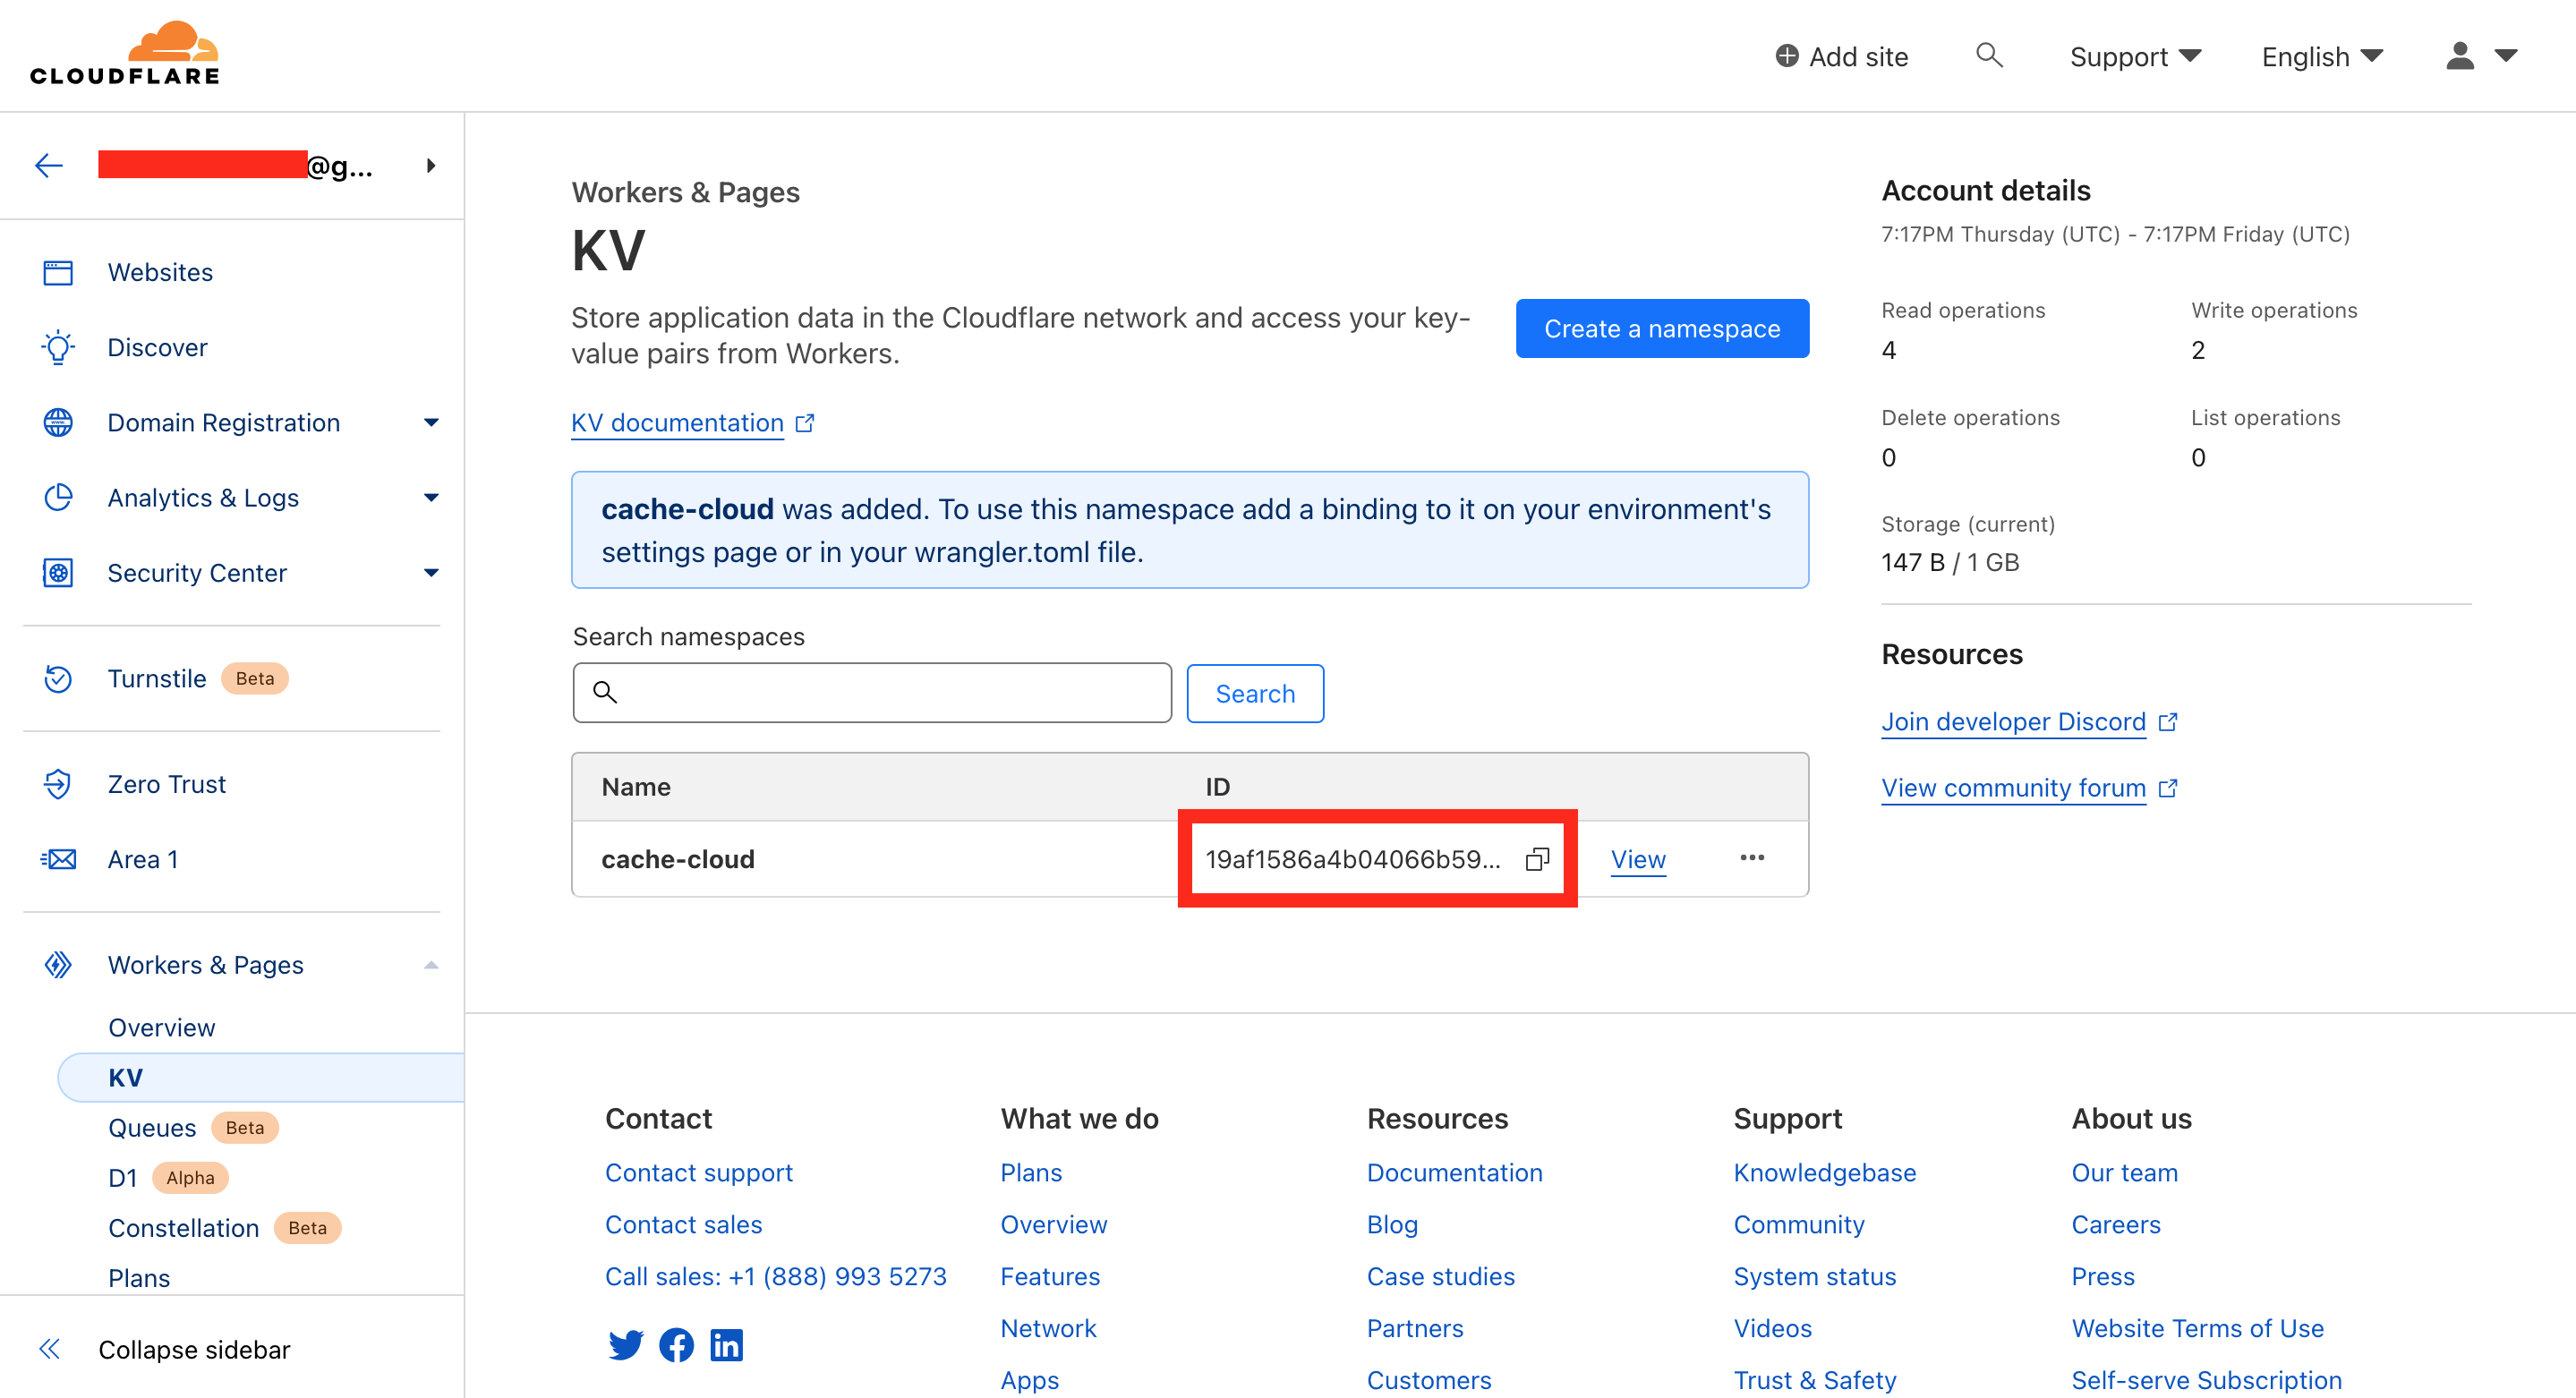
Update the [[kv_namespaces]] of your wrangler.toml as followed with the xxxxxx replaced by the real KV ID.
[[kv_namespaces]]
binding = "KV"
id = "xxxxxxxxxxxxxxxxxxxxxxxxxxxxxxxx"
preview_id = "xxxxxxxxxxxxxxxxxxxxxxxxxxxxxxxx"
Now in Hono route handler, you can access the KV by c.env.KV!
Yes, in actual development, we should create another KV for the
preview_id. For simplicity here, use the sameidfor now.
Implementing the Write functionality
app.put('/kv/values/:cacheKey', async (c) => {
  const cacheKey = c.req.param('cacheKey');
  const { value, expirationTtl = 3600 } = await c.req.json();

  // If value is a JSON, stringify it
  // KV put() accepts only strings, ArrayBuffers, ArrayBufferViews, and ReadableStreams as values.
  let cacheValue = value;
  try {
    cacheValue = JSON.stringify(value);
  } catch (e) {}

  await c.env.KV.put(cacheKey, cacheValue, { expirationTtl });

  return c.json({ success: true });
});
The updates we made:
- Destructuring
valueandexpirationTtlfrom the request body - Assign a default value
3600toexpirationTtl- by default the cache will expire after 1 hour (60s * 60m) - Try to
stringifythevalueif it’s a JSON. If not, keep it as-is - Use
c.env.KV.putto write thecacheValueto the specifiedcacheKeyandexpirationTtl
Implementing the Read functionality
app.get('/kv/values/:cacheKey', async (c) => {
  const cacheKey = c.req.param('cacheKey');
  const result = await c.env.KV.get(cacheKey);

  try {
    return c.json({ result: JSON.parse(result) });
  } catch (e) {
    return c.json({ result });
  }
});
The updates we made:
- Update the handler to ba
async - Use
c.env.KV.getto read the cache value - Try to
parsetheresultand return a JSON-ize response. If not, return theresultas-is
Deploy and Test it
Let’s deploy our read write endpoints to Cloudflare and test it!
npx wrangler deploy
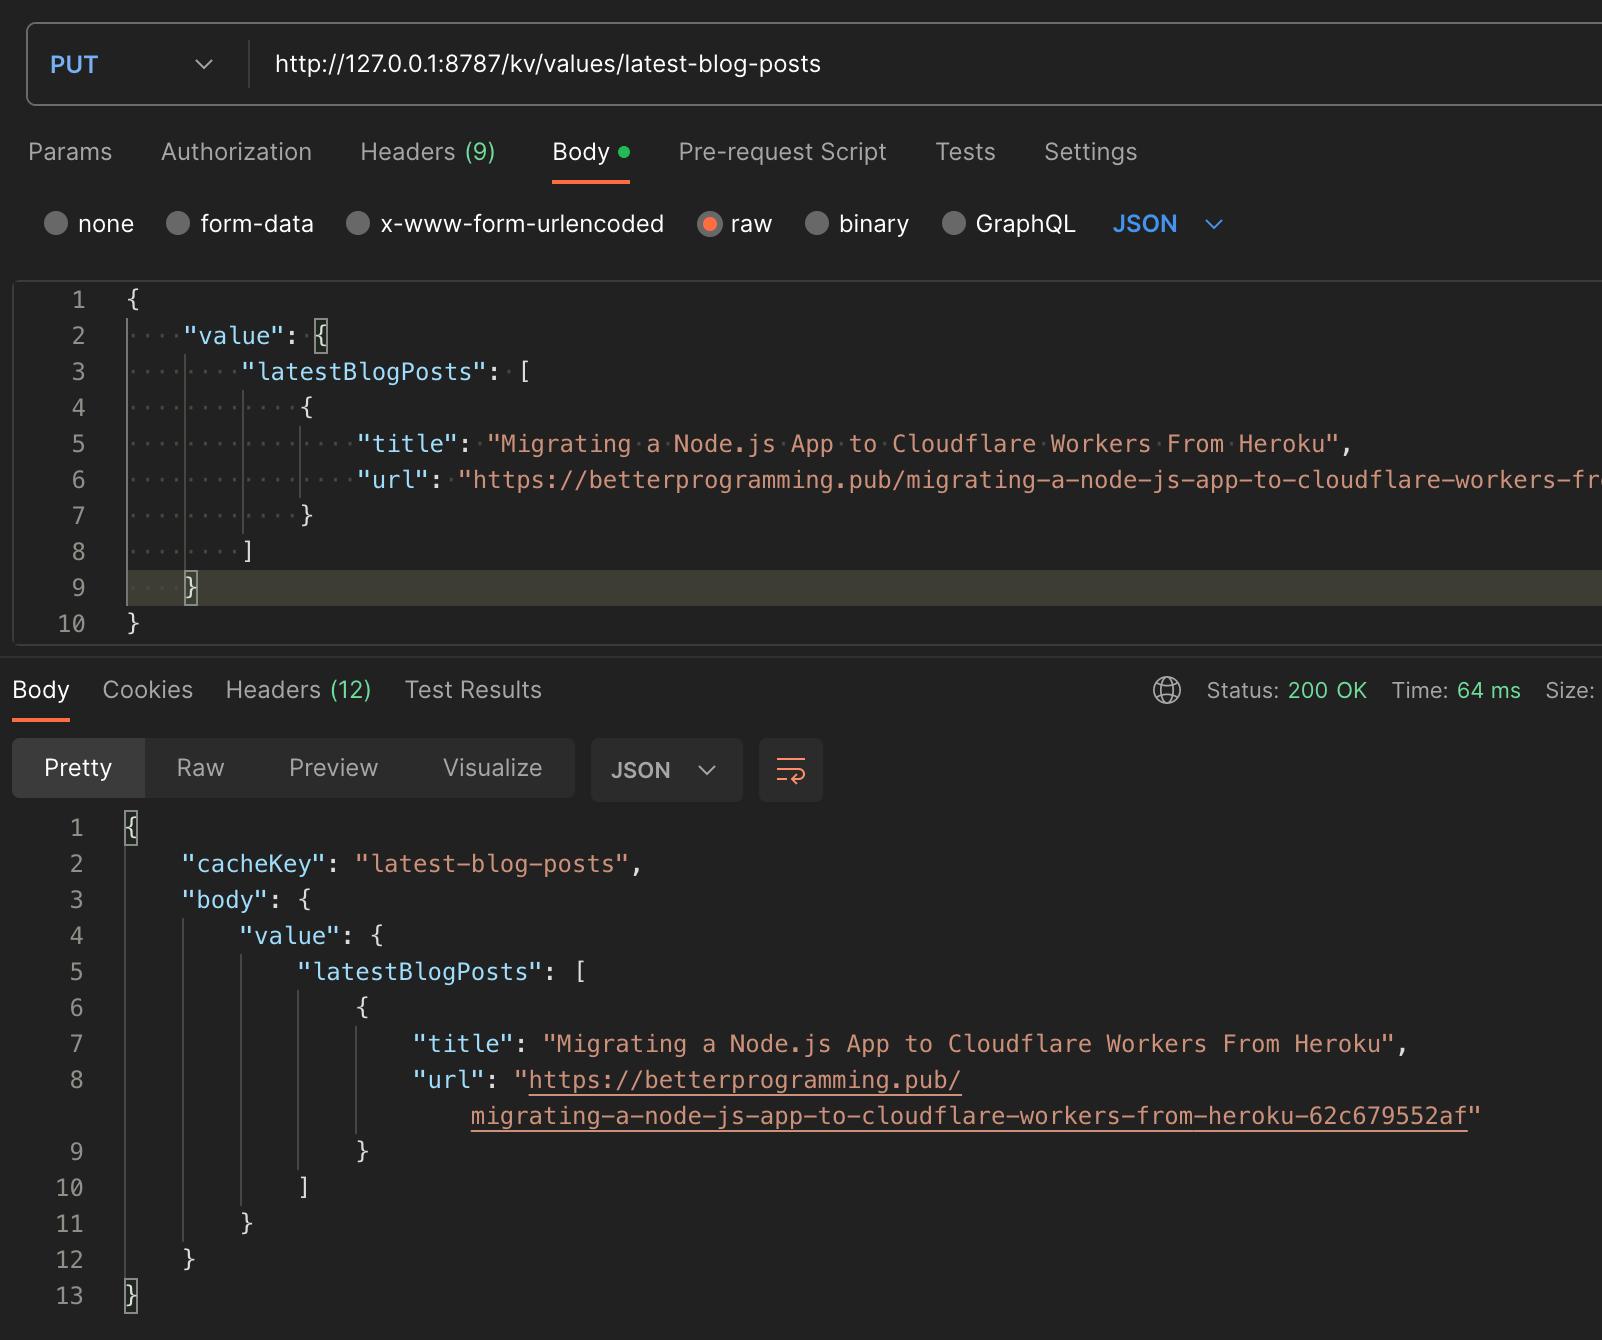
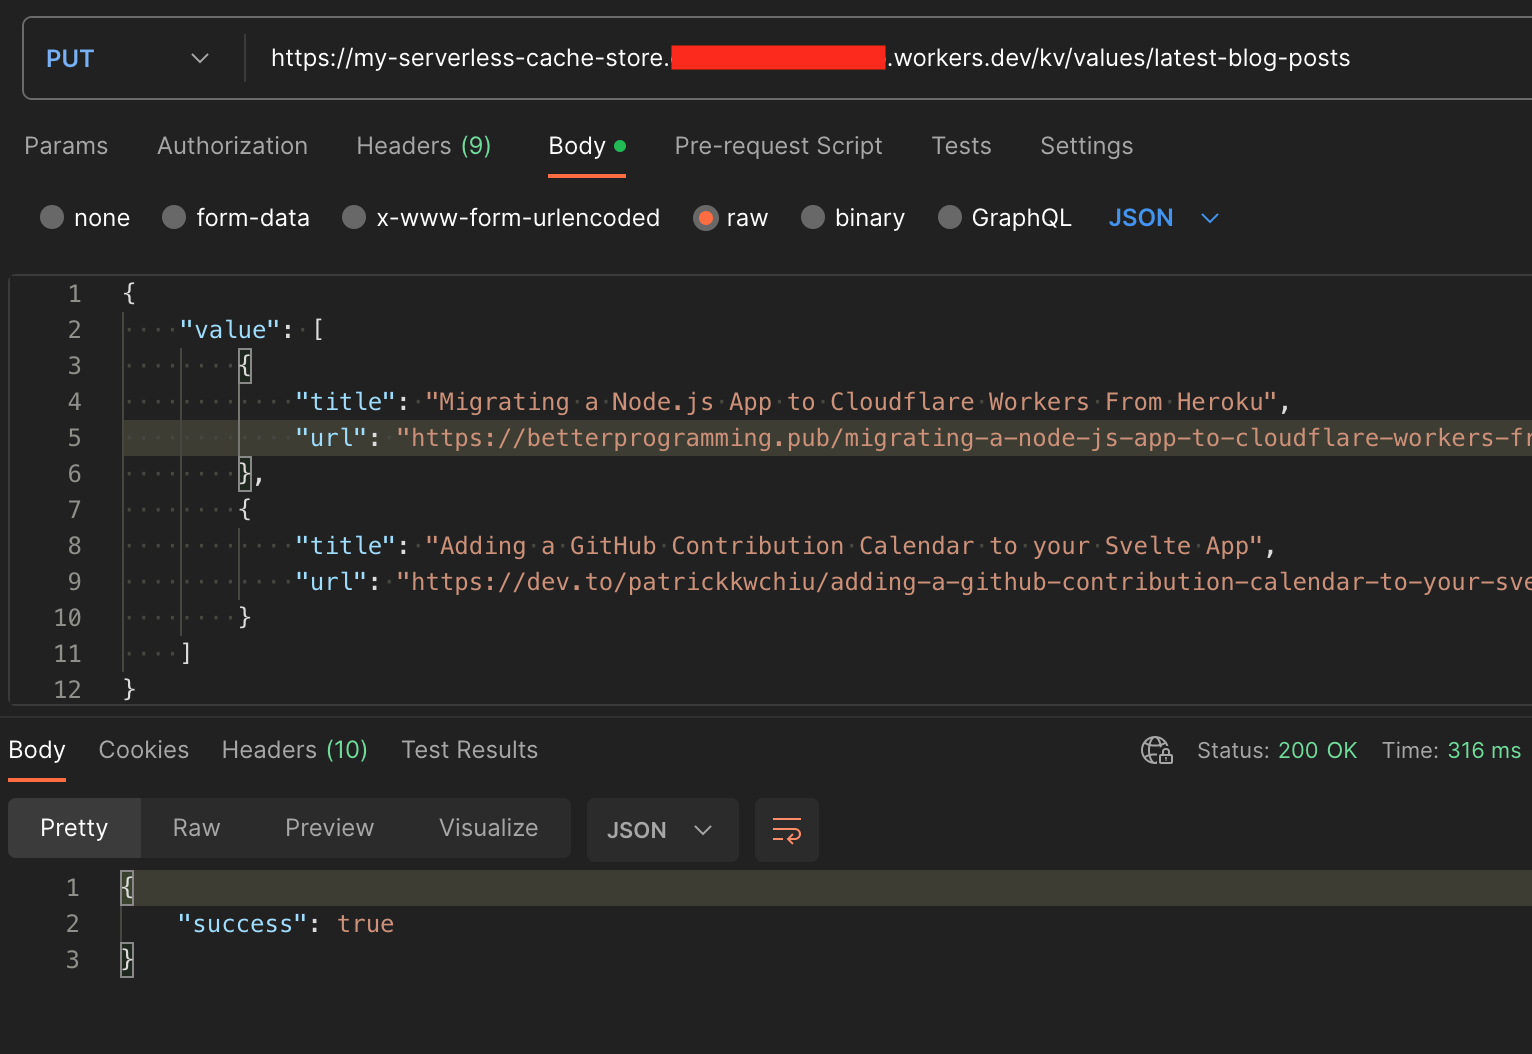
Write a cache
E.g. caching your latest blog posts
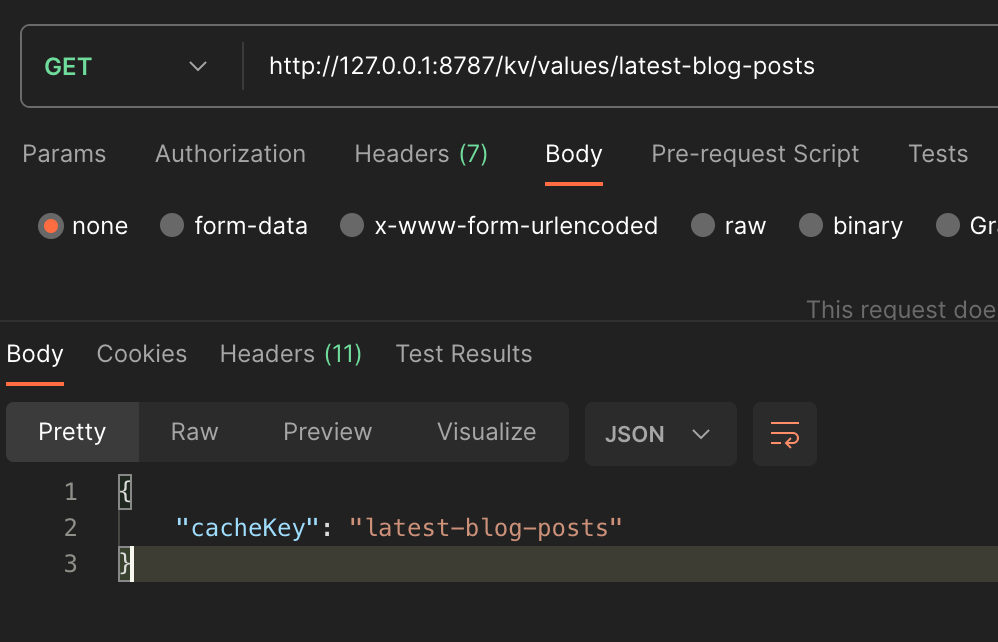
Read the cache value
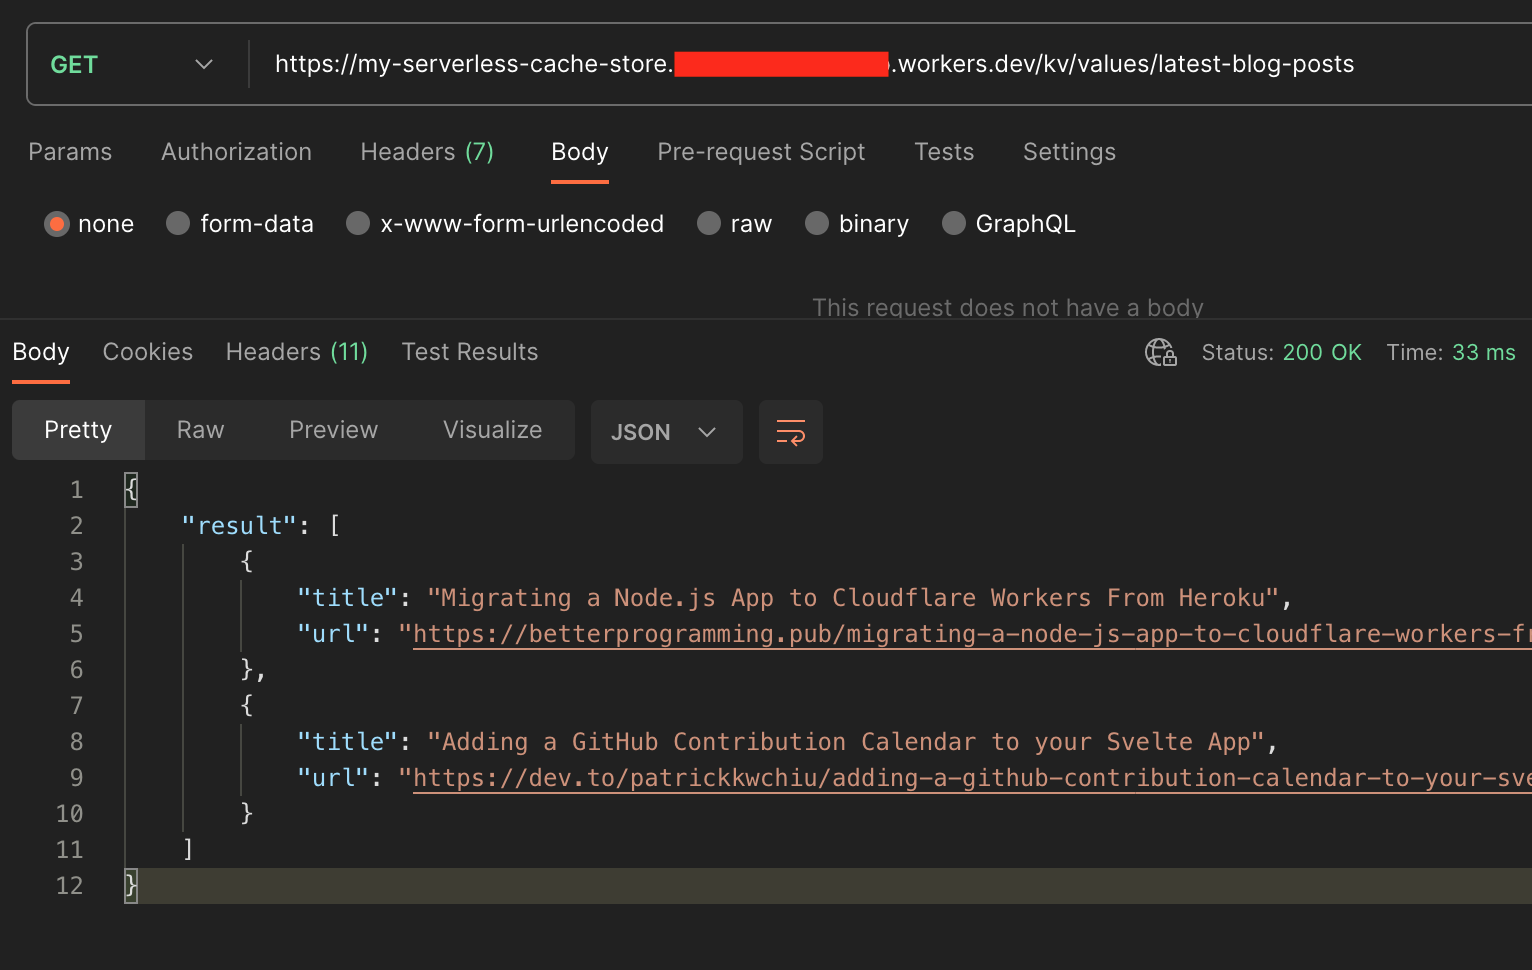
The speed is quite fast with a 33ms.
Note: It is probably much slower the first time you read the value, since Cloudflare didn’t cache the KV to the edge location, until your initial read. After that, it will be ultrafast!
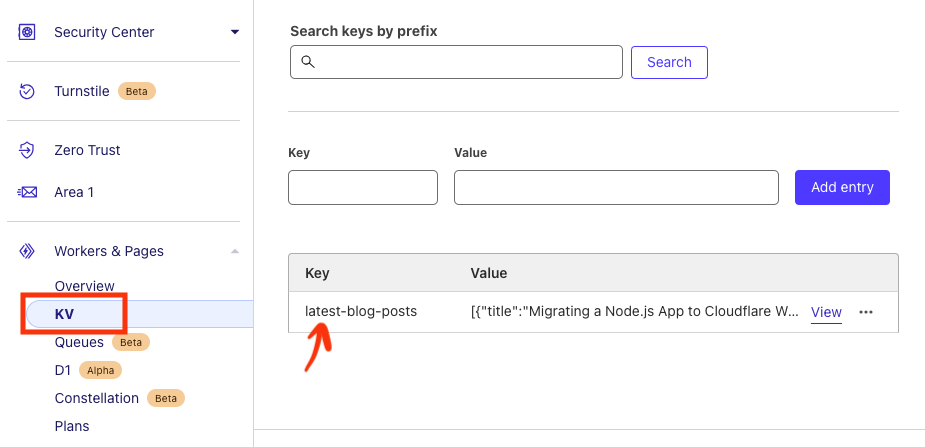
You can also view the cached value in the Cloudflare dashboard
Epilogue and Cache Cloud
We’ve learnt how to use KV in Workers and gone through the steps to utilize Workers and KV to create a serverless KV store.
If you want a full version of the KV store, I’ve built Cache Cloud which you can instantly deploy to your Cloudflare Workers with read, write, delete, list and bulk read/write/delete functionalities. (Shameless plug hehe)